
A Persona is an AI character that Brevity users interact with as part of a role play conversation. Adding a persona to a course is required for creating a course. Adding a persona allows you to align the context of the conversation with a realistic conversation partner that represents a relevant industry, role, or personality type.
Navigating to the Persona Builder:
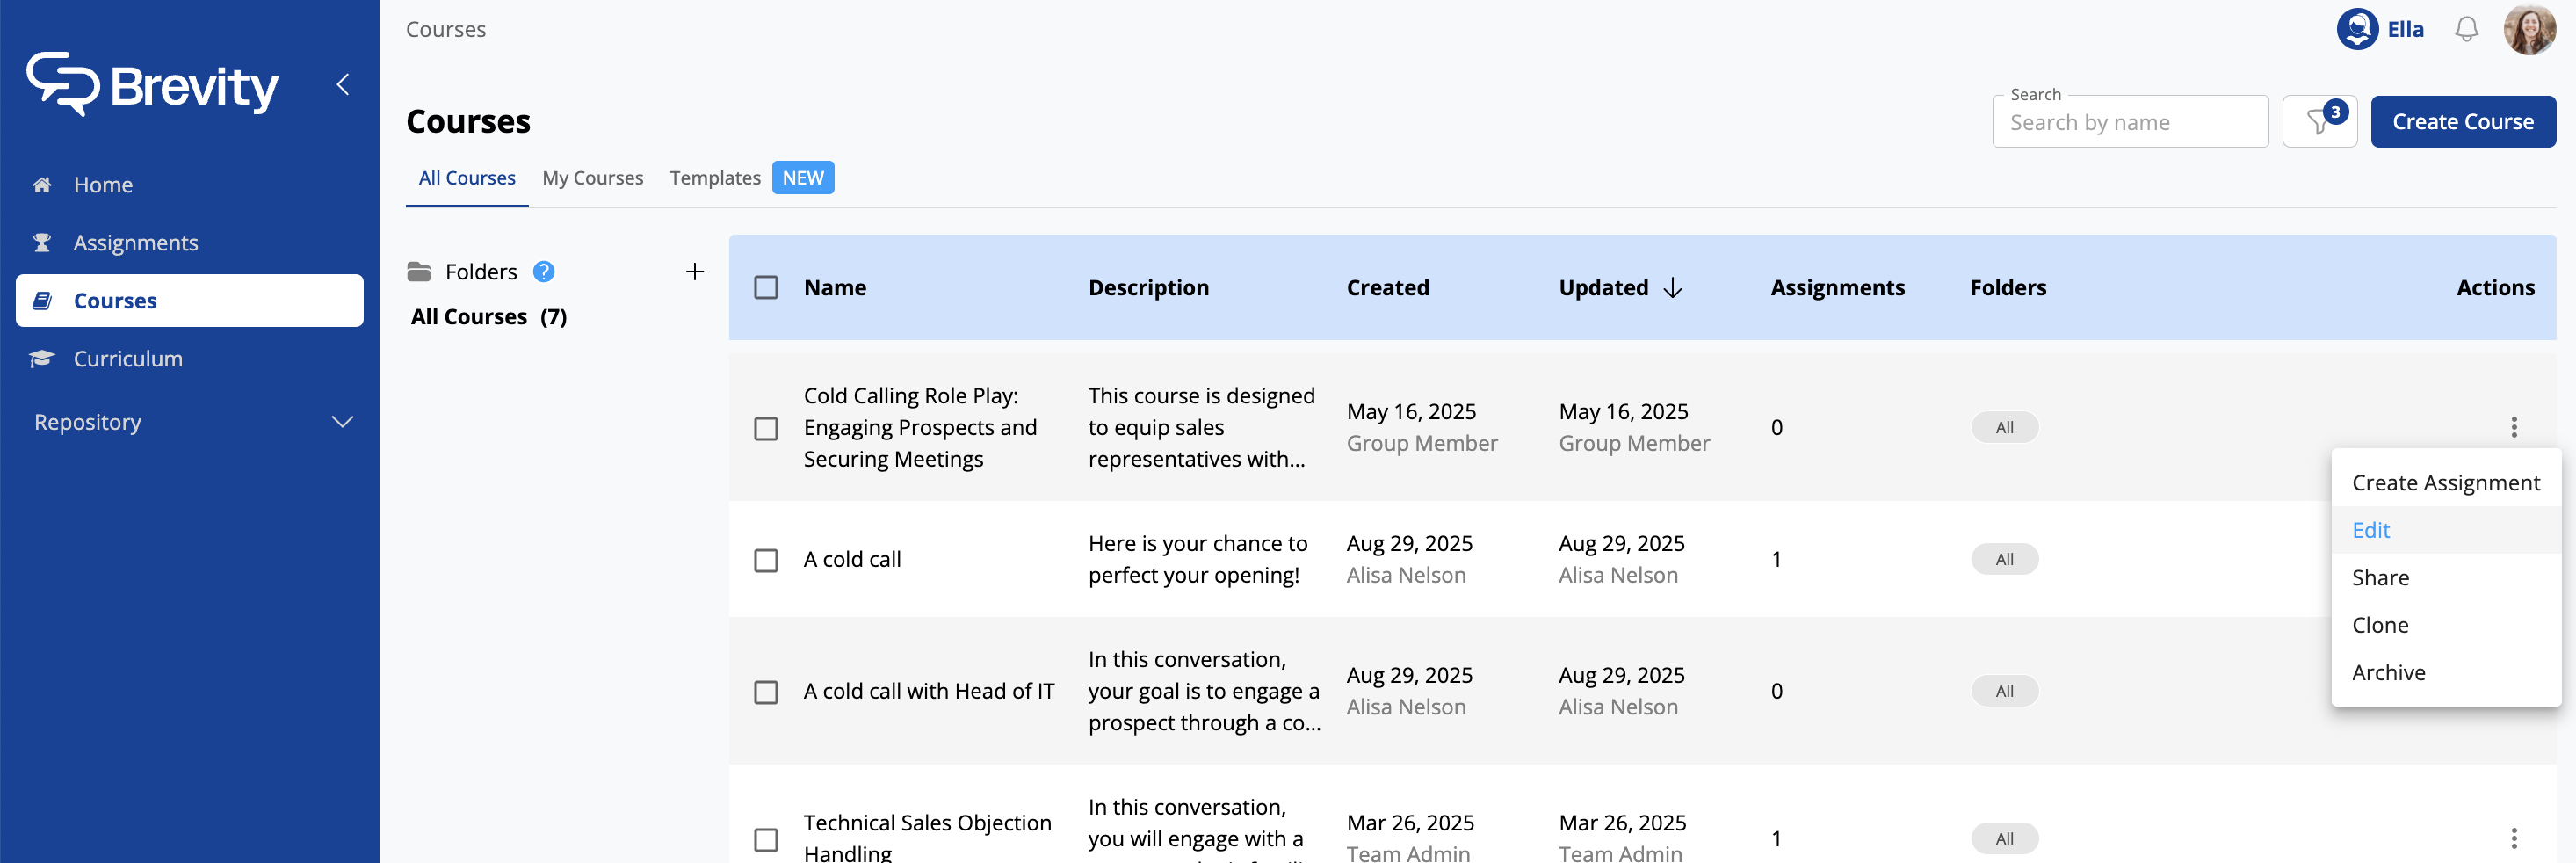
- Select the Courses tab in the left hand navigation bar.
- To add a Persona to an existing course, click the "Edit" button found in the "Actions" menu to the right of your course of interest.
- Otherwise, click the "Create Course" button to open the Course Builder and start from scratch. If you need guidance on managing Courses in Brevity, see this support article: Brevity Courses Overview
- Navigate to "Step 4: Personas"
- To add an existing Persona to your course, click anywhere on the Persona's card will. This will turn the card Blue, adding it to the course. Clicking again (turning the card white) deselects that Persona.
- To add a new Persona to your course, click the "Create New" button and proceed through the Persona Builder steps, detailed below.
See below for a detailed tutorial on how to create a new Persona for your Brevity course.
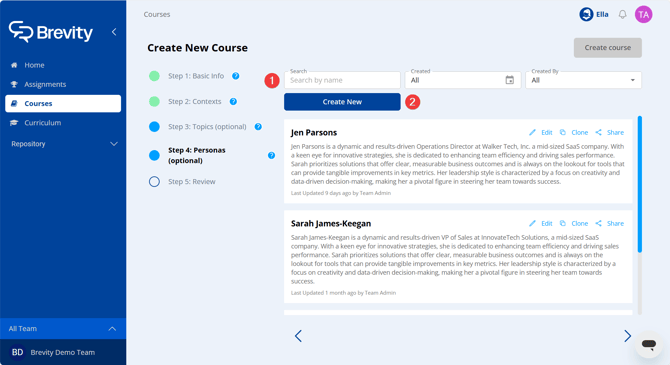
- Use the Search, Created, and Created By fields to filter previously created personas for selection
- To create a new persona, click Create New.
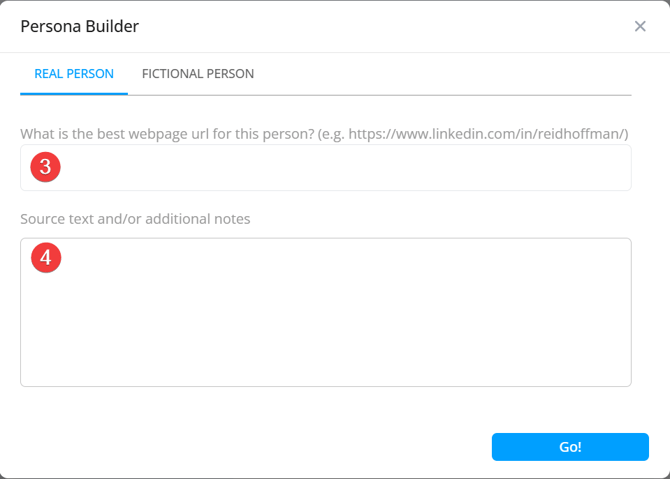
- To build a persona based on a real person, on the Real Person tab, enter the URL of the person's LinkedIn profile.
- Enter any additional resources or notes.
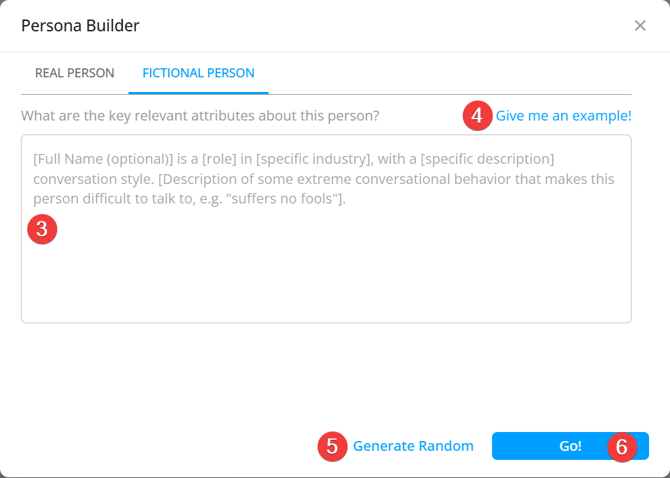
- To build a persona for a fictional person, on the Fictional Person tab, briefly describe the fictional persona.
- Click Give me an example! to see an example persona description.
- To generate a random persona, click Generate Random.
- When you are finished, click Go!
Editing a Persona
Persona Information
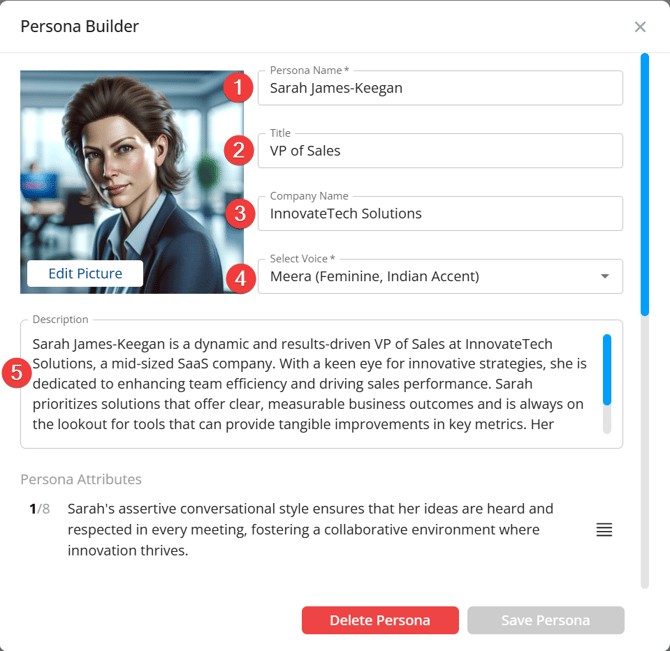
- Enter the persona name in the Persona Name field.
- Enter the persona title in the Title field.
- Enter the persona's company name in the Company Name field.
- Select a voice for the persona in the Select Voice drop-down menu.
- Enter a description for the persona in the Description field. The description can include information about the persona's professional background, areas of focus, and demeanor, for example.
Persona Attributes
Persona attributes can be used to include specific elements of the persona's personality and conversation style, areas of professional interest, or details about their role & relationship to you and your company. Think of these attributes as the unique characteristics or situation your AI character is going to bring to your conversation.Cli
Add Persona Attribute
To add a persona attribute:
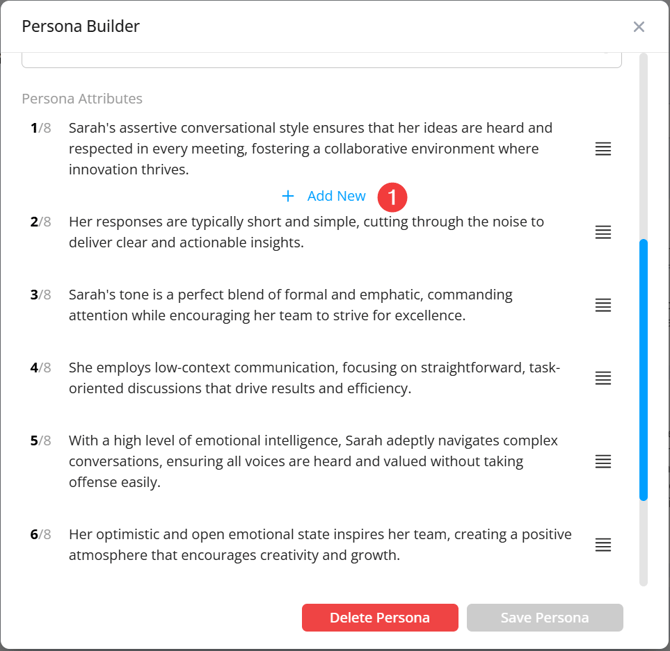
- Hover your mouse in the space between attributes, then click Add Attribute.
Edit Persona Attribute

- Click the attribute you want to edit.
- Describe the attribute in the Persona Attribute field.
- To delete an existing attribute, click Delete.
- To save changes, click Save.
Persona Picture
To edit the persona's picture:
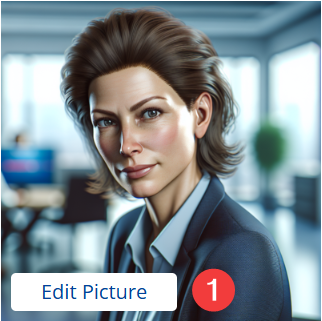
- Click Edit Picture.
- To regenerate the picture from the persona description, on the Regenerate tab, edit the persona description.
- To add a picture from a real person, on the From URL tab, enter that person's LinkedIn URL.
- To upload a picture from a local drive, on the Upload tab, drag-and-drop the image, or click Select files from your device to upload the image.
- When you have made your updates via any of the three methods, click Update Image.
